Warning: These modifications to the Black Diamond Whippet are in NO way endorsed by Black Diamond or any of its employees and will nullify any warranty possibilities. The use of the Whippet in any other way than that intended by Black Diamond is NOT recommended. Ski mountaineering, backcountry skiing, and climbing are dangerous. Please…ski, climb, and modify at your own risk!
This is the first ski season I’ve had with a Whippet in the quiver, and I find I take it with me more times than not when climbing and skiing steeper couloirs now…especially this time of year when the snow is firm. They are also handy for steep and icy skinning where slide-for-life potential exists.
One thing about the Whippet, is that the more times your use it, the more you want to use it, and the beefier you want it to be. When I was in New Zealand last fall, Andrew McLean (who used to work and design gear for BD) showed me a few modifications that make the Whippet an even better tool for skiing the gnar. I am no engineer and have limited access to certain tools, so I’m sure there are better ways to achieve this mod, but here is the hacker version.
Anyone who is serious about their Whippets will no doubt opt for carbon fiber lowers, instead of the aluminum ones that come stock with the Whippet. BD offers a sleeve that makes their carbon lowers compatible with the larger diameter upper, and it works great, but the top of the lower tends to rattle around a bit inside. Applying some duct tape on the end of the shaft keeps everything tight and quite. Length is important when customizing your pole also, and it helps to have a pole that collapses small for climbing the steeps…since that is when you’ll be using the Whippet the most. I cut my carbon fiber lower so when fully collapsed, the total height of the pole is just under 3 ft. To each his own though, but just remember you can’t put back on what you cut off.
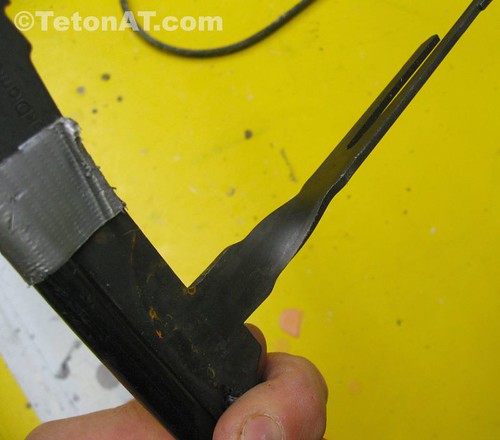
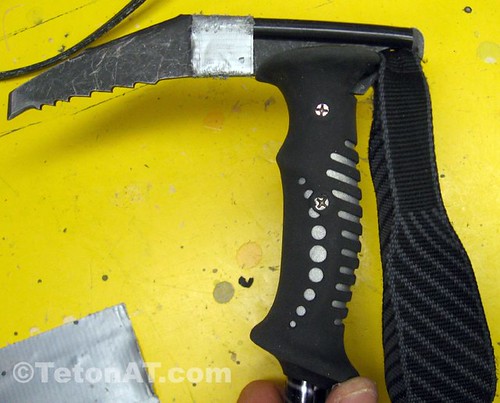
Some of you may not know this, but the pick of the Whippet is removable. This is great if you only have one set of poles and don’t want to lug it around all the time, but the more you use the pick, the more you wish it was truly fixed to the grip of the pole. This is achieved by first removing the pick and getting rid of the twist that helps lock it into place inside the pole. I used a vise to make it straight and it worked well. Then, use a hacksaw to cut off the two prongs on the bottom…they will be useless now.
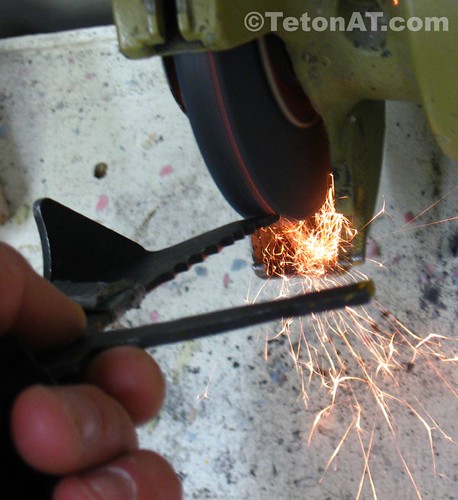
Before moving forward, I took this opportunity to sharpen the pick on a grinder. I know you’re not supposed to use these to sharpen picks and crampons, cuz they create too much heat and weaken the metal, but I’m willing to gamble that it will be alright. I sharpened the point and removed the first tooth on the pick, to help get a good stick and for better hooking performance.
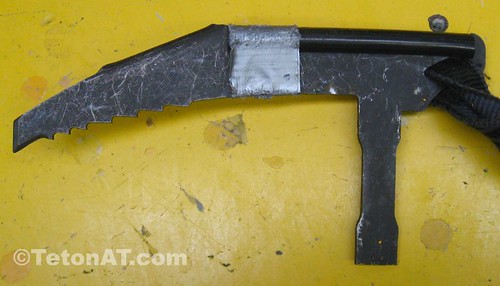
Now it is time to drill some holes. The most important part of this mod is drilling the holes so everything lines up nice. I first used a ruler to find the center of the pole inside the grip and marked it. You are going to drill two holes to fix the pick, so space them out accordingly. One near the top, and the other near the center…positioned so it still goes through the metal section of the pick inside. Once you locate where the holes need to be made, there is a step-by-step process that helps to ensure proper alignment.
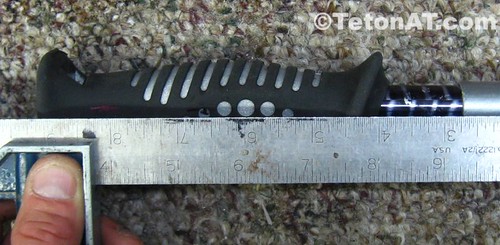
With the pick in place inside the grip, hold the drill as close to vertical as possible and drill through one side of the grip…just enough so the drill bit marks the metal of the pick inside. Remove the pick from the grip and drill through the metal where it was marked by the bit, hopefully this is close to the center. Now reinsert the pick into the grip and line the holes up so that you can insert the drill bit and continue to drill through the opposite side of the grip. Repeat this process with the other hole. I cleaned up the holes on the grip a little bit, so everything would be a bit more flush.
I used some small bolts to affix the pick to the grip, but I think Andrew had his nicely riveted…so use whatever you have access to. Remember though, the strength of the connection will rely a lot on what you choose to use. I guess the goal of this mod is to make the Whippet more like a real ice ax, which I think it does.
Insiders at BD tell me that a 2nd generation Whippet is in the works, that incorporates some of these mods into the production model. When it will be available to the public is anyone’s guess though.
Happy Whippetting!

Yeah, whippets work up to WI3 if you have one ‘real’ tool. Just use the whippet in the hole that the ‘real’ tool made. Take extra effort to make a deeper hole with the ‘real’ tool, then piggyback the whippet into it. It works on the up, as seen here in Great Basin.
http://www.biglines.com/photos/blpic42549.jpg
Is that the right photo Derek?
Maybe I’m missing something. 😕
Well, not really. That is the Whippet Lower Technique. We climbed that pitch with one whippet and one tool each. This is the downclimb technique. You chain your poles together and pass the tools back and forth.
We left the rope, screws, and rest of essentials at the base of the couloir. Ooops.
Nice Steve! Whippet good.
Here are a few other suggestions for Whippet Mods:
– I round off all of the sharp edges where my gloves touch with a file, especially in the wing area. This makes it more comfy as well as being easier on glove wear.
– I give the teeth an ice axe tune as well (side filed).
– The rectangular slot in the upper pole shaft is a potential weak spot, especially if you are plunging the pole or walking through big talus. I pull the shaft out of the grip, trim off the top part and reinsert it such that the slot is gone, or at least buried in the handle.
– I cut down both my uppers and lower such that when they are collapsed, they are as short as can be (about 65cm?) and when fully extended, they are at exactly my preferred skiing length. You can’t probe with these, but probe poles are a distance second (more like tenth..) to real probes anyway.
..also, you can file the Whippet teeth and front bevel by hand if you don’t have a grinder.
Thanks for the additions Andrew! 😀
Steve,
Trying to figure out why you did the mod were the whippet pick is permantently fixed to the ski pole grip? Is there a problems with the Whippet pick unintentionally detaching from the grip? Save weight?
Thanks, Hapro
Hey Harpo!
As you become more used to using Whippets…you want them to be more and more bomber…beyond what BD intended them to be used for. Fixing the head adds more security. I think BD may be coming out with one that is already fixed at the head in the next year or two.
Yes, Black Diamond will begin offering the new and improved Whippet for Winter ’07-’08. Specific changes include: A slightly more aggresive pick, smaller diameter poles (16mm & 14mm instead
of 18 & 16, no longer is an adapter needed to add a carbon fiber lower). It is slightly more collapsable, and the biggest change is the whippet itself which is no longer removeable, it is now riveted to the grip.
This should save you some time in the shop mod’ing these beasts!
Thanks Plinko!
I’ve heard only rumors about the new Whippets, so it’s good to hear that the next generation is on the way. Already put my order in.
[…] Really though, two big improvements to the Black Diamond Whippet. The first being the riveting of the pick to the head. Older designs used to let you remove the pick, sometimes giving you the willy’s when you really might need to hang on one. I posted a how-to to the same thing with older Whippets…click here if you missed it. The second improvement is the addition of a little plastic around the top of the handle. The metal had a tendency to tear into gloves and the plastic keeps things warmer too. The only thing I could see to make it better is to have it come in a shorter length…or two sizes., because you’ll probably want it short for climbing the steepest couloirs…and I’d sacrifice overall length to have it compact shorter. And another thing…if I’m going to spend $100 for one…I think I’d spend $125 for it to be carbon fiber. […]
[…] Doors Guide: How to Install Fireplace DoorsWhippet Modifications | TetonAT.comSimple Inspirations by Sandy: June 2008Build a bee box – Wildlife – How to – Canadian […]