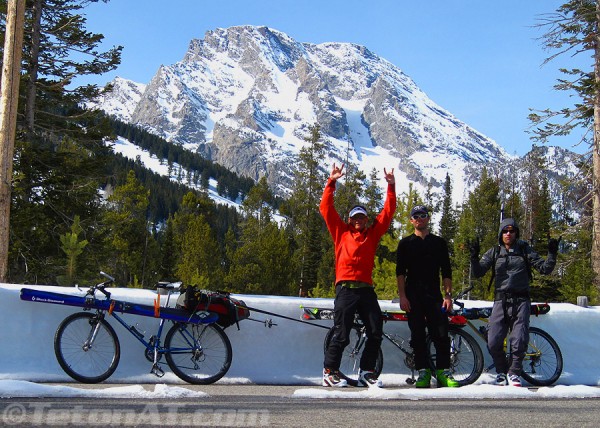
 Using your bike to access ski descent is super rad! Click all photos for larger images.
With the coming of spring…or at least the plowing of the GTNP inner road, it is a great time of year to incorporate a bicycle into your ski tours and shoot for some of the peaks and lines north of Teewinot and Cascade Canyon. FWIW, I don’t think a bike really helps you that much for skiing Teewinot itself (assuming there is still snow on the ground in the valley to ski on), so I usually pull out the cycle for anything north of that peak. It’s kind of fun riding the bike in the wee hours of the morning…and adds to the adventure for sure!! Anyway, I’ve got a POS for a bike, which is just about what it takes to roll up the road to where you might start skinning. Having a POS helps you worry a little less about it when you stuff it into the trees and are off skiing as well. Having a bike that shifts gears is a bonus!!! Here are some tips that I find really help with making your ski-bike experience a good one.
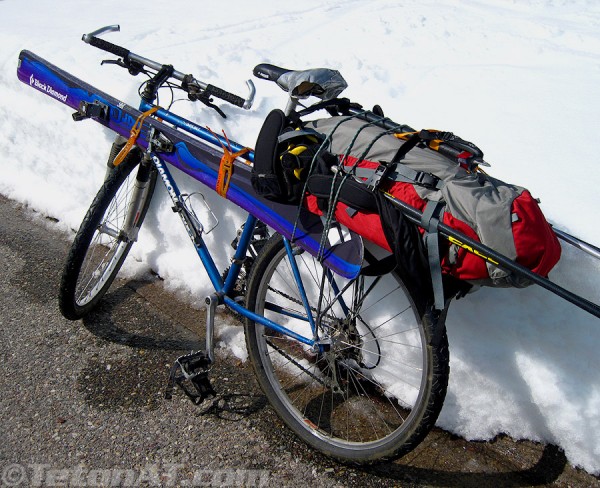 Ski tails in front and a rack for your pack make riding with your skis a breeze!
Slick Tires– Well, they don’t have to be total slicks and a little bit of tread helps for those light dustings or icy spots on the road. But getting rid of those knobby off-road tires really makes pedaling on the pavement much easier and faster. Pump the tires up to 80psi…and you can really fly!!! Rear Rack– I’m a wus (and sensitive in those certain spots) and I really hate carrying a pack when I’m riding the bike…especially if it’s a large and heavy one when doing overnight trips. A rear rack is perfect for strapping your pack onto, but…
1. Make sure it is centered on the rack. There is nothing worse than seeing your pack slowly fade to one side and throw off your balance. 2. I use a couple pieces of 4mm accessory cord to secure the pack. Too skinny a cord can bite into your cold hands in the early morning and be hard to untie. Too fat a cord can sometimes be hard to tighten down. I like 4mm cord. 3. Make sure it is tied down tight!!! Having to stop once you gotten started riding to fiddle and re-tie the cord again bites…and wastes time.
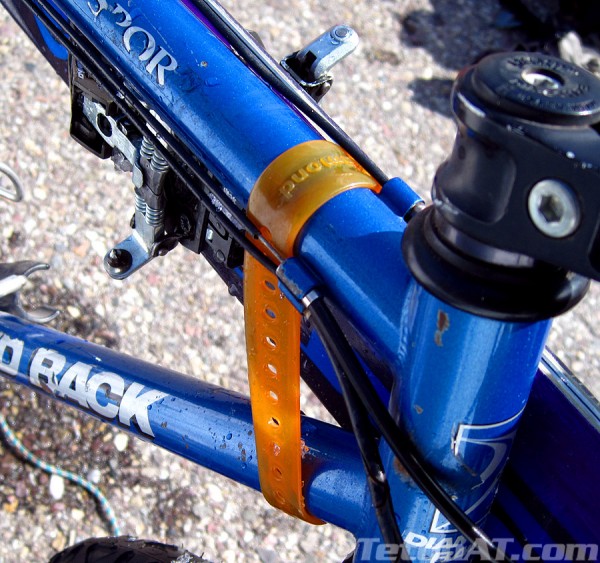 Be sure to run the ski straps under the cables. This allows them to keep them working, shifting gears and activating the brakes.
Skis On Bike Frame– This is best way I’ve found to transport skis on a bike…at least skis with Dynafit bindings. Here are a few hints to do it quickly and effectively.
 1. Two long ski straps are all you need to strap the skis on the bike…one in front…one in back. 2. Running the straps under the cables assures your brakes and gear shifters will still work. 3. Tails in front is the name of the game and be sure to position the rear of the binding well in front of the head tube. Also, be sure
 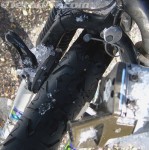 that the tips of your skis don’t rub against the rear tire. This…would be the suck!! 4. I also like to disengage the front brake cables. Your steering can sometimes be limited with the skis attached to the bike (not a real problem though) and the front brake cables might bind up when you turn the handle bars. Disengaging them means you won’t endo over the bars when you are turning.
Pedal in Ski Boots– If you pedal in your ski boots, it’s one less thing you have to attach to the bike or carry on your back. It’s not that hard either. Old-school pedal cages help out a lot here. Well…that is about it. I’ve attached upwards of 100lbs onto my bike, including skis, poles, over-night pack and sled, and it seems to roll down the road pretty good. The hardest part is getting your speed up from a stand still. Good luck and happy pedaling!!!

Steve,
Did this last year on an attempt on Moran. My tip to add is that riding in your ski boots actually works quite well even with clipless pedals (at least Shimano type).
I’ve got some approach questions for you though. To go into Garnett canyon right now, do you recommend a bike? And which trailhead do you recommend? Do you go right up the bottom of the canyon (assuming there is a more strait-forward route than in summer)?
Scott
Scott…no bike for garnet. ski from taggart TH…across Bradley lake and up the canyon. should be tracks.
great post!
I’m a bit confused as to why you wouldn’t just throw skis + boots on your pack (aframe style is best) and ride that way?
clearly, that’s a lot more weight on your body, not on your bike, but I don’t see the point of rigging your bike to carry all the gear if it’s not necessary.
tommy…i don’t know about you, but certain parts on my anatomy don’t really like riding a bike with 30-40 pounds on my back. maybe if you are lance armstrong and have iron-taint…it’s not that bad, but for me, i’d rather take 15 minutes and rig the gear on the bike, than pedal with it on my back,
It’s all about the BOB trailer, roughly 185,392 times better than strapping all that stuff on your bike or your back.
frank…that is a no brainer, BUT…not everyone owns a BOB trailer and they cost around $300. so this is the dirt-bag ski bum version.
Rando, you sell out! Bar ends and toe clips are akin to tele!
ha! not much of a biker…what you don’t know can’t hurt you!!!! 🙂
OMR, the biking equivalent of telemark is single-speed riding. Much harder, but also lots of fun.
I’ve always fantasized about in-line skate attachments that you can clip onto your ski boots. Wouldn’t be any good for gravel roads but you could “ski” before and after the snow on the pavement. Easy to stash or carry along as well and you don’t really need other shoes.
Then there’s unicycling with the split-mono…
ptor…how is this different than roller blades?
if you said…”in-line ski attachments”…that sounds cool!!! some clip-on roller skates for your AT boots could be another way to approach on pavement…but it seems it would much slower than a bike. no?
Well, Rollerblades is the brand name. I was thinking the wheel assembly on a frame that you clip on like a step in crampon to make your alpine/at boots into in-line skates (rollerblades) so you wouldn’t have to have an actual set of skates(with it’s own boot) if you wanted this mode of transport/access. Of course not as fast as a bike, especially on a dirt road but it’s closer to “skiing” the whole way if you like and you don’t have to lock/stash your bike at the trailhead and have the option of wheeled transport (which is very small and portable) if you come out at a different place. Would work better in the alps I think. It’s fun to rollerblade mountain roads! (and scary). Regardless, I love using the bike and is always great access. Thanks for the attachment tips.
Rando,
Hey just giving you some crap. I admire anyone who can do more with less, gear should never be the excuse. Example: couple years ago I climbed the Grand Teton with my Dad, who was 76 years old at the time. At the TR he was laughed-at by some young bucks becasue of his 35-year old, external frame pack. His army-surplus boots didn’t help either. (Gear he had used for years.) Funny thing was, he passed those “Gore-Teryx-heads” a mile up the trail, like they were standing still. They weren’t laughing anymore. Your bike is awesome.
no worries! and ptor…that sounds like it would be a funny sight…dude roller-skating with a pack and skis on their back. send me a photo!!! 🙂
I could be wrong, but I think that installing Dynafit toe pieces to your pedals would greatly improve the efficiency of your pedal stroke.
What about SPDs on your bootsoles?
dirybunny…you could be on to something. and i think ptor would agree that we’d probably rather have dynafit on our pedals than have to carry around the extra weight of SPDs on our boots while we are out touring. plus the glop factor could be pretty high when booting.